Custom Reports
Custom reports can be complex to build. If you’d like to run a custom report, talk with your Kapost customer success manager (Customer Service Representative) for guidance.
Note: Access to this feature will need to be give by a customer service representative.
How It Helps
Custom reports allow you to slice and dice your data however you’d like to. These reports are completely customizable to allow you to pull content and performance metrics specific to your content operation.
Best Practices
- While you’ll find value in other Kapost features by experimenting with various filters and other options, you shouldn’t have to play around with custom reports often. Only run a custom report when you’re looking for a very specific data point that you can’t find anywhere else in Kapost.
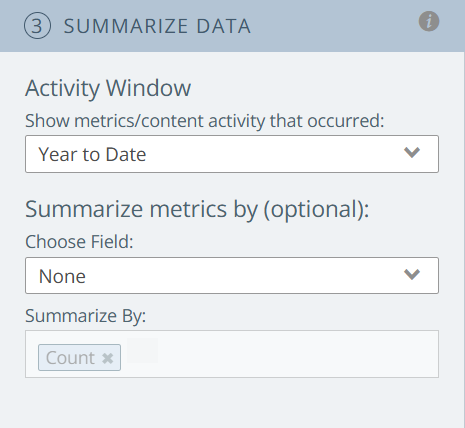
- Unless you’re running a custom report for a narrow window of time, set the report’s activity window for all time in the Summarize Data area.
- Custom reports can be a good way to see analytics on your workflows. Use them when you need to dig deeper into your workflow Insights charts.
How It Works
Note: We strongly recommend that you speak with your Kapost customer success manager if you’d like to run a custom report. Your Customer Service Representative can help with the complexity of building a report so that you’re not held up generating data.
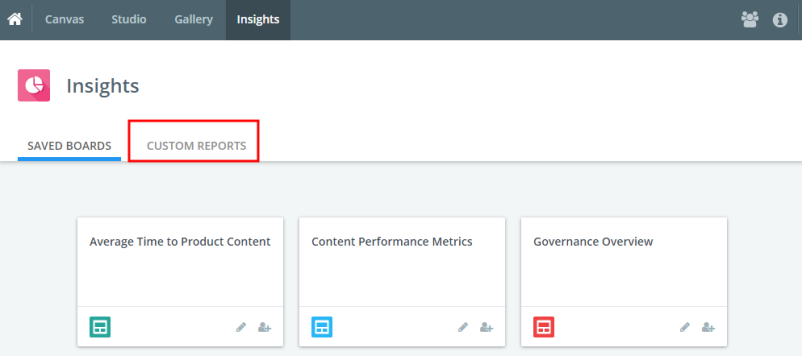
Navigate to the Insights app at the top of the screen. Select the Custom Reports tab.
Saved Reports
Any saved reports generated for your instance’s content inventory will appear at the top of this page. To access a saved report, select the name of the report.
Scroll down just below this to the section to build your report with custom filters, columns, and other parameters.
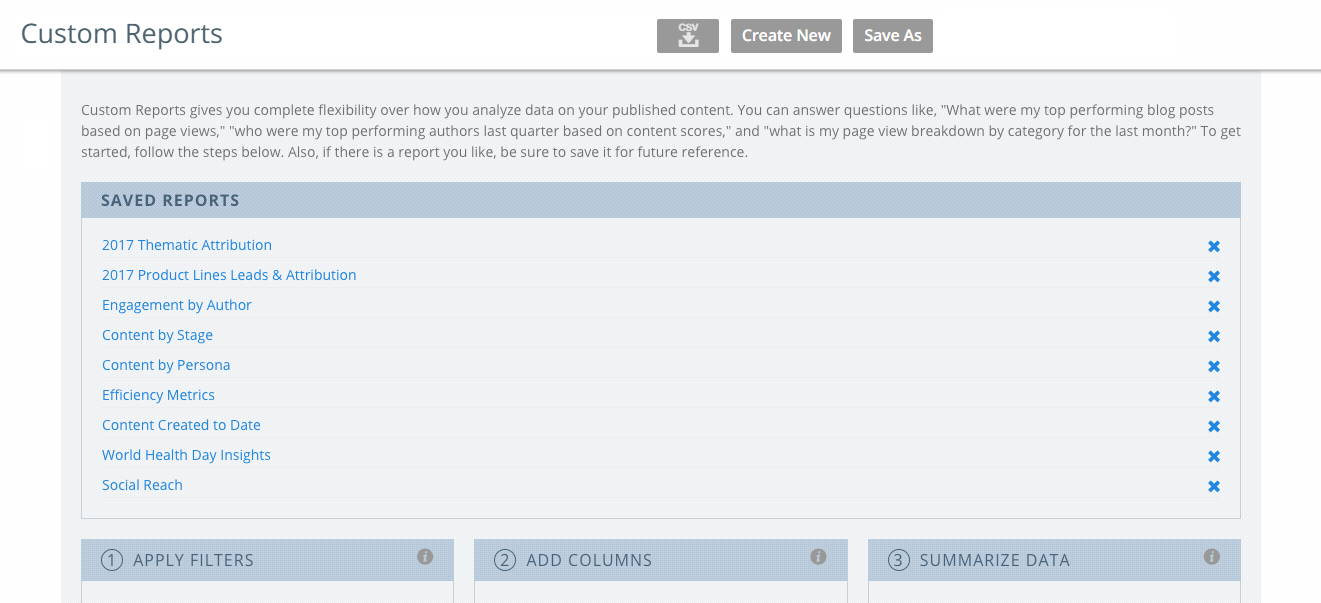
Build your custom report here by selecting the parameters for the data in the report.
- Custom reports will return analytics on content that is in progress as well as published content.
- Custom reports return data on your content inventory; they don’t return data on initiatives.
- Kapost analytic results will include any archived content in custom reports. Kapost will continue to gather page views indefinitely. Social analytics (Facebook and X (formerly Twitter) stats) will stop gathering after one year.
Apply Filters
Choose the filters to apply on content that you want to analyze in your custom report using the options in the drop-down menus. You can apply metadata as filter options.
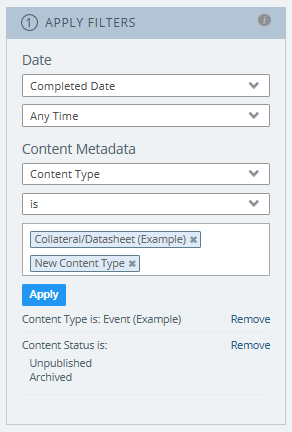
- Remember the difference between Completed Date and Created Date in the Apply Filters area.
- Created Date means the day that the content was created in Kapost.
- Completed Date means the day when the content was marked as complete in Kapost based on its workflow.
- Multiple filters can be added to conduct a search. When you select multiple data points all at once, this is an "or" search. When you select one data point and select apply, then select another data point and click apply again, this is an "and" search.
Add Columns
Choose columns to specify the data on content that will appear in the columns in your report.
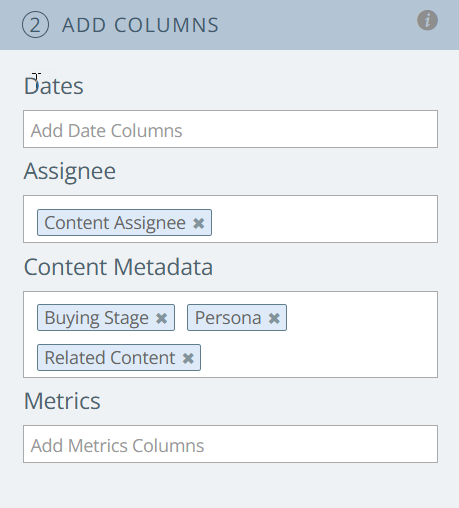
Tip: Users can generate a report to view the Related Content details associated with specific content by adding it as a column. The Related Content entries appear as clickable links, allowing users to navigate directly to the associated content.
In Progress Duration (Days) displays the total number of calendar days the content remained in "In Progress" status.
In Progress Duration (Weekdays) displays the total number of working days (Monday to Friday) the content remained in "In Progress" status.
Both values appear in the report only after the content transitions to "Complete" status.
Summarize Data
Specify the window of activity your report will provide data within (such as page views between January 1st and January 25th).
You have the option to define how you want the metrics to be summarized, or grouped by content metadata (such as page views by content type or author).
Save your custom report by clicking the Save As button at the top of the page. Your report will be added to the list of saved custom reports on this page.

If you update any parameters of an existing report and wish to save it as a new one, click the Save As button at the top of the page. A pop-up will appear prompting you to enter a new report name. Your new report will then be added to the list of saved custom reports on this page.
If you update any parameters of an existing report and wish to save the changes, click the Save button to update the current report.

Download your custom report by clicking on the CSV button at the top of the page.
